1. The inlet must be located away from heavy dust concentrations.
2. Check the inlet location; make it sure that exhaust gases are directed above and away from the air cleaner inlet. Soot from exhaust is a prime enemy of paper filters.
3. The air supply to the air cleaner must be must be of adequate size and unrestricted.
4. Check the air cleaner to make sure it is the correct size for the engine.
5. The air cleaner element must be new when installed. It is not good practice to clean air cleaner, it could be damaged in this process.
6. Make sure the clean air ducting after the air cleaner is unrestricted and it is of adequate size.
7. Check the service indicator for damage, working lock-up function, and correct calibration per engine manufacturers recommendation.
1. Make sure the element has not been damaged in handling. Examine for dents and holes.
2. Be certain that all gasket are sealing. Examine for dust trails, which indicate leaks. Check to be sure wing nut is tight.
3. Examine the clean air transfer tubing for cracks, loose clamps, or loose flange joints.
4. Check air compressor connections (if used) to be certain these are leak free.
5. Check ether fittings (if used) to be certain no contaminants are entering the engine through these connections.
Note: Be sure to empty the pre-cleaner bowl or cup as required

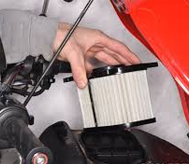
1. Remove the old element as gently as possible
Carefully remove the dirty element, until you get it clear of the housing. Accidentally bumping it while still inside will result in dust and dirt contaminating the clean side of the filter housing, before the new element has chance to do its
job.
2. Always clean the inside of the housing carefully
Dirt left in air cleaner housing spells trouble for your engine. Always use a clean damp cloth to wipe every surface clean. Check it visually to make sure it is clean before putting in a new element.
3. Always clean the gasket sealing surfaces of the housing.
An improper gasket seal is one of the most common causes of engine contamination. Make sure that all hardened dirt ridges are completely removed, both on the bottom and top of the cleaner.
4. Check for uneven dirt patterns on your old element
Your old element is a valuable clue to dust leakage or gasket sealing problems. A pattern on the element clean side is a sign that the old element was not firmly sealed or that a dust leak exists. Make certain the cause of that leak is identified and rectified before replacing the element.
5. Press your fresh gasket to see if it springs back
Make sure your new element is made with a highly compressible gasket that springs right back when your finger pressure is released. A quality gasket is one of the most important parts of the element.
6. Make sure the gasket is seating properly
If you don’t feel the gasket is seating evenly for perfect seal, then you don’t have adequate protection. Rechecking to see if the sealing surface in the housing is clean, or if the element is the correct part number. It may be the wrong size for the housing..